레이블이 Spring인 게시물을 표시합니다. 모든 게시물 표시

2012년 11월 21일 수요일

Invalid bean definition in Spring & VMwaer PowerCli

Today, I'd like to talk about two things. 

1. Same spring Error: Invalid bean definition 
The first is about the Spring error that caused due to the wrong bean definition. The message was the same with my last post.

org.springframework.beans.factory.BeanDefinitionStoreException: Invalid bean definition with name 'WebServiceLocatordefined in file [C:\xxx\src\.metadata\.plugins\org.eclipse.wst.server.core\tmp0\wtpwebapps\fdc-web\WEB-INF\classes\applicationContext.xml]: Could not resolve placeholder 'ws.userat org.springframework.beans.factory.config.PropertyPlaceholderConfigurer.processProperties(PropertyPlaceholderConfigurer.java:268)
...

In conclusion, the symptom was because applicationContext-jdbc.xml was loaded twice. Look at my web.xml 
...
<context-param>
     <param-name>contextConfigLocation</param-name>
     <param-value>classpath*:applicationContext*.xml</param-value>
</context-param>
...


It is directive that loads all of the xml files which begin with "applicationContex". for example, applicationConext-a.xml and applicationContext-b.xml etc.. would be loaded when the web server starts. 


And I don't run the web server when I try testing my modules by run Junit Test. So, I need to add one line, my local applicationContext.xml to load additional xml config file.  

.....
<import resource="classpath:applicationContext-jdbc.xml"/>
.....

If I return to run and test modules with web server, I should have commented out this line. But I forgot that. 
<!-- <import resource="classpath:applicationContext-jdbc.xml"/> -->


2. VMware PowerCli 
VMware supports PowerCli which handles and managed VM and ESXi host by using Windows Powershell. 

It is able to download and install from here.
After run PowerCli, it looks like command prompt. (it has smaller window and it is not easy copy & past).

In my opinion, Powershell windows looks better and is easier than PowerCli.
It is also simple work for handling VMware as it work in powerCli.

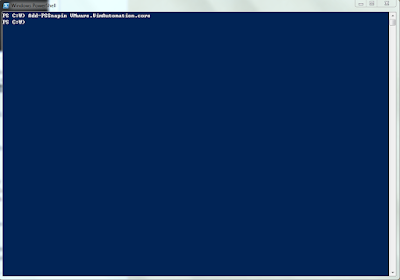
Run Poweshell and type like the following:
PS C:\> Add-PSSnapin VMware.VimAutomation.core

# Connect to ESXi Server
PS C:\> Connect-VIServer -Server 192.168.20.162 -Protocol https -User root -Password **********

# Get a VM
PS C:\> $vm = Get-VM -Name swift-storage1 | select *

# Get an error while run get-harddisk 
PS C:\> Get-HardDisk -VM $vm
Get-HardDisk : Cannot bind parameter 'VM'. Cannot convert the "" value of type
"System.Management.Automation.PSCustomObject" to type  "VMware.VimAutomation.ViCore.Types.V1.Inventory.VirtualMachine".
At line:1 char:17
+ Get-HardDisk -VM <<<<  $vm
    + CategoryInfo          : InvalidArgument: (:) [Get-HardDisk], ParameterBi
   ndingException
    + FullyQualifiedErrorId : CannotConvertArgumentNoMessage,VMware.VimAutomat
   ion.ViCore.Cmdlets.Commands.VirtualDevice.GetHardDisk

I ran command with option " | select * ". 
This option made the VM recognize different object. Let's try Get-VM again without " | select * "

PS C:\> $vm2 = Get-VM -Name swift-storage1
PS C:\> $vm2.GetType()
IsPublic IsSerial Name                                     BaseType
-------- -------- ----                                     --------
True     False    VirtualMachineImpl                       VMware.VimAutomation.ViCore.Impl.V1.Inventory.InventoryIt...

# However, $vm is actually PSCustomObject, not VirtualMachine object.
PS C:\> $vm.GetType()
IsPublic IsSerial Name                                     BaseType
-------- -------- ----                                     --------
True     False    PSCustomObject                           System.Object

# It returns results normally. 
PS C:\> Get-HardDisk -VM $vm2

CapacityGB  Persistence        Filename
----------    -----------        --------
100.000      Persistent          [datastore1] swift-storage1/swift-storage1.vmdk
100.000      Persistent          [datastore1] swift-storage1/swift-storage1_1.vmdk


2012년 11월 17일 토요일

Work to downgrade Spring framework to 2.5

I was merging a module of controlling VMware virtualization into a web project (This post was not about VMware, but Spring framework). This module originally ran on spring 3.0. The web project was supposed to develop on spring 2.5. It had to be changed to run on 2.5. While I was changing, I did the following works: 

1. In Spring 3, properties were easily injected to bean class using @value annotations, but in 2.5, it had to be defined setter method for every property which needs injection (@value is not supported in 2.5)
In 3.0
class class01 {
    @Value#{contextProperties['ws.user']} 
    private username;

In 2.5
class class01 {   
    private username;

    public setUsername(Strping username) {
         this.username = username
    }

2. In Spring 3, the context component scan worked well and it didn't need to define beans in applicationContext.xml, but in 2.5, every bean had to be defined in the configuration file.
In 3.0
<context:component-scan base-package="com.xxx.xxx" />

In 2.5
<bean id="bean01" class="com.xxx.xxx.xxxx01" />
<bean id="bean02" class="com.xxx.xxx.xxxx02" />
...

3. In Spring 3, I used xml style configuration file and  PropertyPlaceholderConfigurer wasn't needed. But, In 2.5, I was returned to properties file.
In 3.0
<util:properties id="contextProperties" location="classpath:database.xml"/>
....
....
<bean id="bean01" class="com.xxx.xxx.xxxx">
    <property name="user" value="#{contextProperties['ws.user']}" />
</bean>

In 2.5
<bean class="org.springframework.beans.....PropertyPlaceholderConfigurer" >
    <property name="location" value="database.properties" />
</bean>
....
....
<bean id="bean01" class="com.xxx.xxx.xxxx">
    <property name="user" value="${db.user}" />
</bean>

4. I was stuck with an error.
Caused by: org.springframework.beans.factory.BeanDefinitionStoreException: Invalid bean definition with name 'WebServiceLocator' defined in class path resource [applicationContext.xml]: Could not resolve placeholder 'ws.user' at org.springframework.beans.factory.config.PropertyPlaceholderConfigurer.processProperties(PropertyPlaceholderConfigurer.java:268)
...
...

This was occurred because Spring couldn't read *.properties files. However, I was certainly defined them.

In applicationContext.xml 
<bean class="org.springframework.beans....PropertyPlaceholderConfigurer">
    <property name="locations">
         <list>            
             <value>ConfigPrd_ko.properties</value>
             <value>database.properties</value>
         </list>                            
     </property>               
</bean>

the location of PropertyPlaceholderConfigurer was its problem. It was located in the middle of configuration file. After I changed its location to the top, it was solved. The definition of PropertyPlaceholderConfigurer should be placed higher than locations of any other bean definitions.

<?xml version="1.0" encoding="UTF-8"?>
<beans xmlns="http://www.springframework.org/schema/beans"
          xmlns:xsi="http://www.w3.org/2001/XMLSchema-instance"
          xmlns:context="http://www.springframework.org/schema/context"
          xsi:schemaLocation="
          http://www.springframework.org/schema/beans http://www.springframework.org/schema/beans/spring-beans-2.5.xsd
          http://www.springframework.org/schema/context http://www.springframework.org/schema/context/spring-context-2.5.xsd">

<bean class="org.springframework.beans......PropertyPlaceholderConfigurer" >
    <property name="locations">
         <list>            
             <value>ConfigPrd_ko.properties</value>
             <value>database.properties</value>
         </list>                            
     </property>               
</bean>
...
...
<bean id=".... />
<bean id=".... />

2011년 8월 22일 월요일

Manually install spring dependency for Maven


1. Manual install spring dependency for Maven 
For example, I'd like to install srping's core.jar file


mvn install:install-file -DgroupId=GroupID -DartifactId=ArtifacID -Dversion=Version -Dfile=File Path -Dpackaging=jar -DgerneratePom=true


[yeonki@localhost 3.0.5.RELEASE]$ mvn install:install-file -DgroupId=org.springframework -DartifactId=spring-core -Dversion=3.0.5.RELEASE -Dfile=/home/yeonki/spring-3.0.5/dist/org.springframework.core-3.0.5.RELEASE.jar -Dpackaging=jar -DgerneratePom=true
[INFO] Scanning for projects...
[INFO]                                                                         
[INFO] ------------------------------------------------------------------------
[INFO] Building Maven Stub Project (No POM) 1
[INFO] ------------------------------------------------------------------------
[INFO] 
[INFO] --- maven-install-plugin:2.3.1:install-file (default-cli) @ standalone-pom ---
[INFO] Installing /home/yeonki/spring-3.0.5/dist/org.springframework.core-3.0.5.RELEASE.jar to /home/yeonki/.m2/repository/org/springframework/spring-core/3.0.5.RELEASE/spring-core-3.0.5.RELEASE.jar
[INFO] ------------------------------------------------------------------------
[INFO] BUILD SUCCESS
[INFO] ------------------------------------------------------------------------
[INFO] Total time: 2.359s
[INFO] Finished at: Mon Aug 22 18:01:03 KST 2011
[INFO] Final Memory: 3M/15M
[INFO] ------------------------------------------------------------------------


Then, Go to maven's repository path. In my case, /home/yeonki/.m2/repository/org/springframework/spring-core/3.0.5.RELEASE/


[yeonki@localhost 3.0.5.RELEASE]$ dir
_maven.repositories    spring-core-3.0.5.RELEASE.pom
spring-core-3.0.5.RELEASE.jar    spring-core-3.0.5.RELEASE.pom.sha1
spring-core-3.0.5.RELEASE.jar.sha1


** You don't need to install it manually. Maven public repository has already provided spring-core 3.0.5.RELEASE. Visit http://mvnrepository.com/artifact/org.springframework. You can find nearly   everything that you'd like to from here.


2. Uninstall a local dependency
If you want uninstall this, you just delete its directory in the maven's local repository.

[yeonki@localhost springframework]$ rm -rf *core*

2011년 8월 18일 목요일

Fedora: Setting up Spring framework development environment

I'd like to describe my java development environment. All of these jobs were proceeded in a VirtualBox VM which Fedora 15 installed.


1. Download JDK and JRE 
Open java 1.6 had already installed on my machine. But I wanted to install the latest version (1.7). I visited Oracle download site and downloaded the latest RPM for x32.


2. Go to the terminal and execute these RPM files
# User switching to root
[yeonki@localhost ~]$ su -


# Giving all users the execution permission for files start with j
[root@localhost Downloads]# chmod a+x j*


# Installing JDK and JRE, both were installed respectively on "/usr/java/jXX1.7.0/".
[root@localhost Downloads]# rpm -Uvh ./jdk-7-linux-i586.rpm
[root@localhost Downloads]# rpm -Uvh ./jre-7-linux-i586.rpm


3. Make the newly installed one have priority when java invokes

[root@localhost Downloads]# alternatives --install /usr/bin/java java /usr/java/jdk1.7.0/jre/bin/java 20000
[root@localhost Downloads]# alternatives --install /usr/bin/java java /usr/java/jre1.7.0/bin/java 20000


4. Checking the precedent commend.

[root@localhost Downloads]# alternatives --config java
There are 4 programs which provide 'java'.


Selection    Command
-----------------------------------------------
   1           /usr/lib/jvm/jre-1.6.0-openjdk/bin/java
   2           /usr/lib/jvm/jre-1.5.0-gcj/bin/java
*+ 3           /usr/java/jre1.7.0/bin/java
   4           /usr/java/jdk1.7.0/jre/bin/java
Enter to keep the current selection[+], or type selection number:  3

#Checking java

[root@localhost Downloads]# java -version
java version "1.7.0"
Java(TM) SE Runtime Environment (build 1.7.0-b147)
Java HotSpot(TM) Client VM (build 21.0-b17, mixed mode, sharing)


5. Add JDK path to JAVA_HOME
[root@localhost Downloads]# export JAVA_HOME="/usr/java/jdk1.7.0"


6. Download Eclipse
I downloaded Eclipse IDE for Java EE Developers from http://www.eclipse.org/downloads/.
Eclipse Indigo that I downloaded is 3.7. (Helios is 3.6.)


#Untart the file.
[yeonki@localhost Downloads]$ tar -zxvf eclipse-jee-indigo-linux-gtk.tar.gz


#Move eclipse directory to working directory (/home/yeonki/)
[yeonki@localhost Downloads]$ mv eclipse /home/yeonki/Desktop/eclipse/


7. Install Java EE 
I downloaded Java EE 6 SDK Update 3  from Oracle site.


[root@localhost Downloads]# ./java_ee_sdk-6u3-jdk7-linux-ml.sh
Extracting the installer archive...
Extracting the installer runtime...
Extracting the installer resources...
Extracting the installer metadata...
Welcome to GlassFish V3 installer


Using the user defined JAVA_HOME : /usr
Entering setup...
SwixML 1.5 (#144)
File 511/511
File 303/303
File 564/564
File 317/317


8. Install Spring framework
I downloaded the latest Spring famework 3.0.5.RELEASE at Springsource


#Unzip the file.
[yeonki@localhost Downloads]$ unzip spring-framework-3.0.5.RELEASE-with-docs.zip

#Move spring directory to working directory (/home/yeonki/)
[yeonki@localhost Downloads]$ mv spring-framework-3.0.5.RELEASE /home/yeonki/spring-3.0.5/


9. Run Eclipse and Add Spring IDE integration


Go to Help->Install new software


Input the following address http://springide.org/updatesite in the textbox and click Add button.


Input name in the window.


Select components. In these case, I selected Core/Spring IDE, Extentions(Incubation)/Spring IDE and Resources/Spring IDE. If you need to more components than me, I may need addition software, for example, AspectJ Development Toolkit or Maven integation. (You can install these from the menu: Help -> Software market.)


After completed the installation, Eclipse needed to restart.


-------------------------------------------------------------------------------------------
Added 2012-01-26


How to install Sun JDK and have priority when java invokes on Ubuntu
1. Install Java

$ sudo add-apt-repository "deb http://archive.canonical.com/ lucid partner"
$ sudo apt-get update
$ sudo apt-get install sun-java6-jdk


2. Give priority on sun-jdk 

$ sudo update-alternatives --config java


selection   Path                                                 Priority  Status
--------------------------------------------------------------------------------------
  0          /usr/lib/jvm/java-6-openjdk/jre/bin/java  1061     auto mode
  1          /usr/lib/jvm/java-6-openjdk/jre/bin/java  1061     manual mode
  2          /usr/lib/jvm/java-6-sun/jre/bin/java        63        auto mode
Press enter to keep the current choice[*], or type selection number: 2


$ java -version
java version "1.6.0_26"
Java(TM) SE Runtime Environment (build 1.6.0_26-b03)
Java HotSpot(TM) 64-Bit Server VM (build 20.1-b02, mixed mode)


Reference sites: 
1. http://www.if-not-true-then-false.com/2010/install-sun-oracle-java-jdk-jre-7-on-fedora-centos-red-hat-rhel/
2. http://www.lamolabs.org/blog/5562/5-minute-guide-to-using-the-alternatives-command-on-fedoracentosrhel/